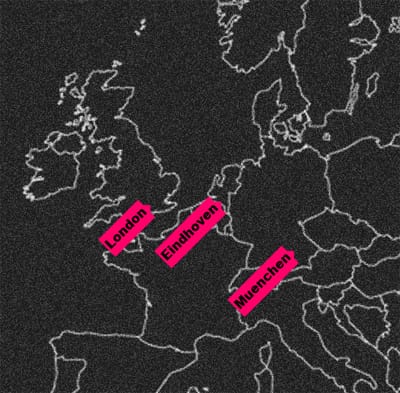

If you need to overlay points of interest on a map or distribute usercontrols on a game board, you can foreach over the items and add them to a placeholder. But all this can be accomplished much easier with an ItemsControl that has a Grid or Canvas as its ItemsPanelTemplate. First let me show you what this demo project does:

public class Location {
public string Name { get; set; }
public double X { get; set; }
public double Y { get; set; }
}
<ItemsControl ItemsSource="{Binding Locations}">
<ItemsControl.ItemTemplate>
<DataTemplate>
    <Grid HorizontalAlignment="Left" Background="#FFFF0069" RenderTransformOrigin="0.5,0.5" Height="30">
        <Grid.RenderTransform>
            <CompositeTransform Rotation="-45" TranslateX="{Binding X}" TranslateY="{Binding Y}"/>
        </Grid.RenderTransform>
        <Rectangle Fill="#FFFF0069" RenderTransformOrigin="0.5,0.5" Width="15" Height="15" HorizontalAlignment="Right" Margin="0,0,-3,0">
            <Rectangle.RenderTransform>
                <CompositeTransform Rotation="45"/>
            </Rectangle.RenderTransform>
        </Rectangle>
        <TextBlock HorizontalAlignment="Left" TextWrapping="Wrap" Text="{Binding Name}" d:LayoutOverrides="Height" FontFamily="Arial Black" FontSize="16" Margin="2"/>
    </Grid>
</DataTemplate>
</ItemsControl.ItemTemplate>
<ItemsControl.ItemsPanel>
<ItemsPanelTemplate>
    <Grid/> // this is a StackPanel by default
</ItemsPanelTemplate>
</ItemsControl.ItemsPanel>
</ItemsControl>
The trick here is to use a Grid in the ItemsPanelTemplate and bind the TranslateX and TranslateY to the X and Y of the model.
public ObservableCollection<Location>  Locations { get; set; }
public MainViewModel() {
Locations = new ObservableCollection<Location>();
Locations.Add(new Location { Name = "London", X = 175, Y = 35 });
Locations.Add(new Location { Name = "Eindhoven", X = 240, Y = 40 });
Locations.Add(new Location { Name = "München", X = 330, Y = 100 });
}
<ItemsControl ItemsSource="{Binding Locations}">