
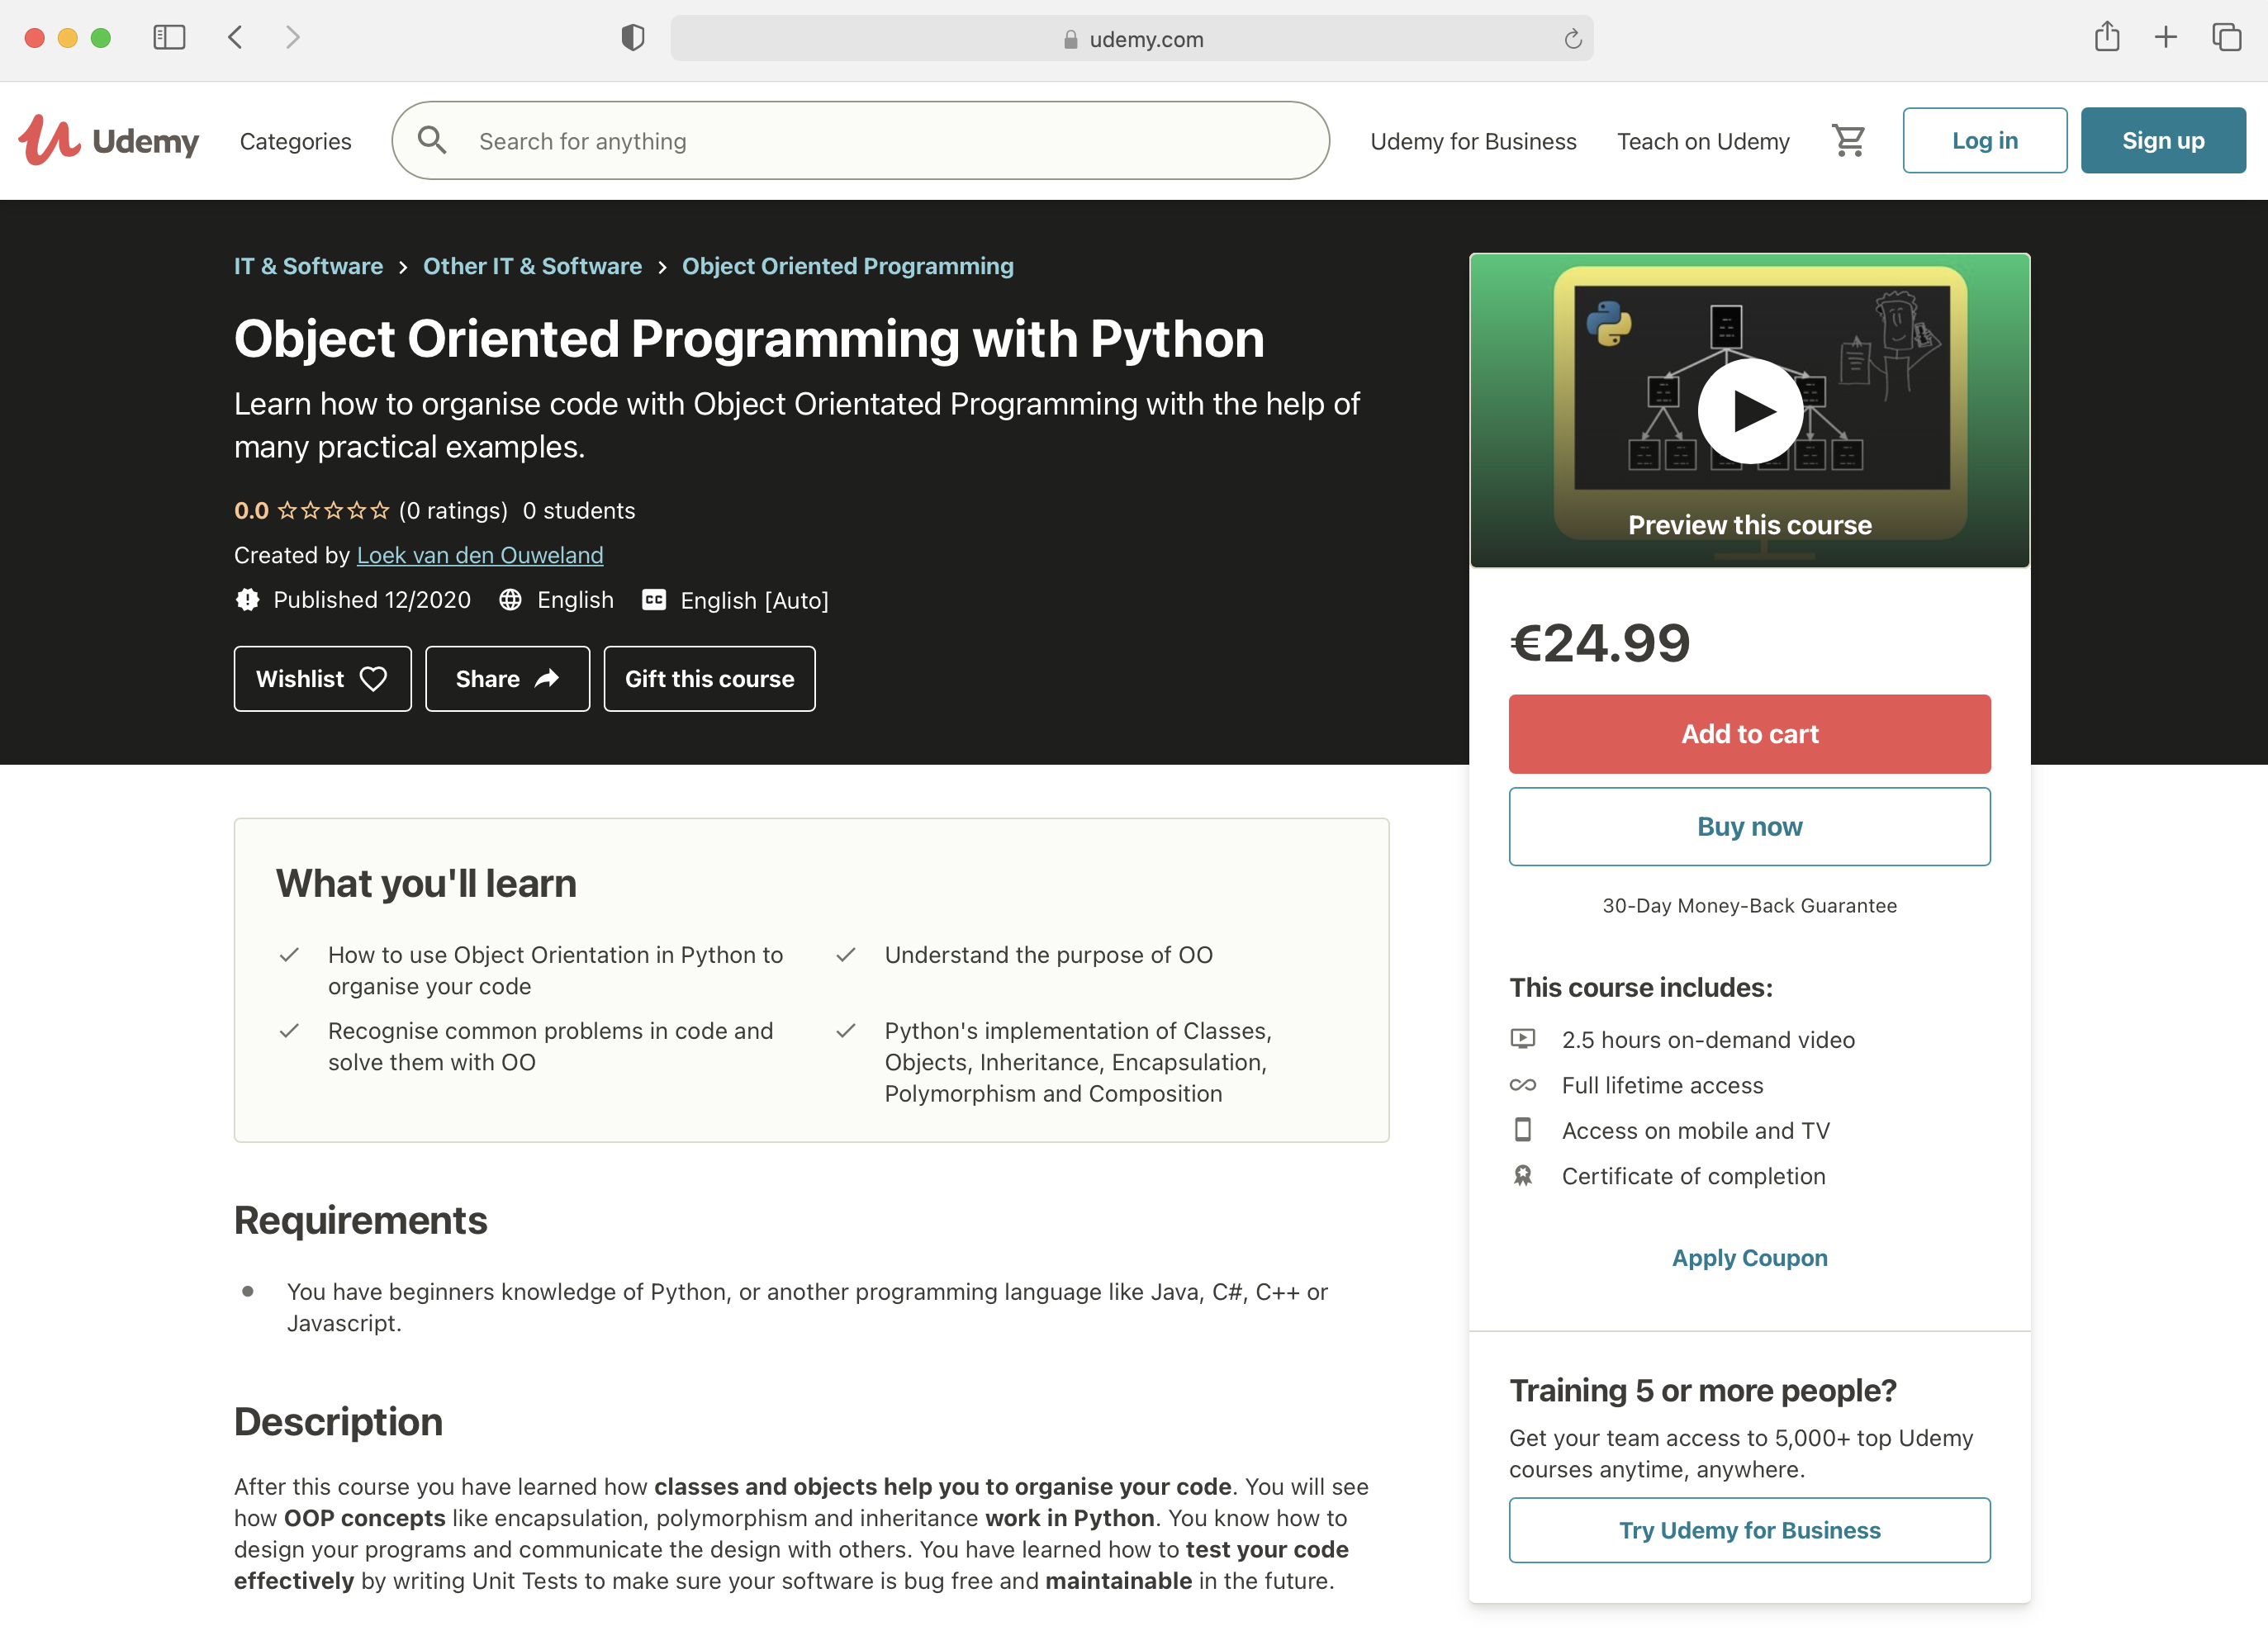
In this article I’m not going to talk about the publishing platform. I chose Udemy just for the reason that I knew the name and they provide a very user-friendly website to structure the course and upload the videos. Here is what the result looks like:
www.udemy.com/course/learn-object-oriented-programming-with-python
To create a course video, it helps to have some experience in recording your voice, apply dynamics to a recorded track and know how to edit video. I work on macOS and used the following software:
Here is a list of the hardware I use:
I give two trainings: Python Basic Training and Object Oriented Programming with Python Training. Every training that I give is focused on the students in the classroom and can vary a bit each time. But there is always a main story that I follow.
I started to make notes in the presenter notes area to make sure I’m not forgetting important things. Then I thought about using this text on my blog or create an ebook from it to accompany my classroom training.
But for a book the text needs to be perfect so I started to edit the script in a way I could read it without improvising.
The cool thing is that you can do this everywhere. I used to print empty handouts and bring them with me on long walks. Then I wrote down the story on the slides with a pen.
Back home, I typed them in:
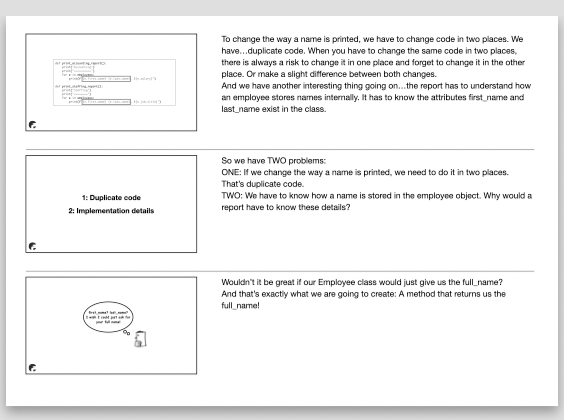
As the script grew, I needed to do two things to the slides:
Since I’m going to use the presenter notes to read from while recording my voice, I want to prevent scrolling with the mouse.
So when the presenter notes exceed seven lines of text, I duplicate the slide and spread the notes over two slides. Another benefit from this, is that you get a good idea of the length of the video since there are no surprise slides with fifty lines of text.
Sometimes I made a variation to the second slide to prevent a long story while looking to long at the same slide. This can make the video more interesting.
My training was roughly divided in 8 Keynote files. During a classroom training, I know how to map the material on the available days for a specific group. But for an online course, the tempo is determined by the viewer. A viewer also might decide to watch the video in a different order.
I looked at how other online courses where layout and restructed my training a bit. Here are the things I needed to do:
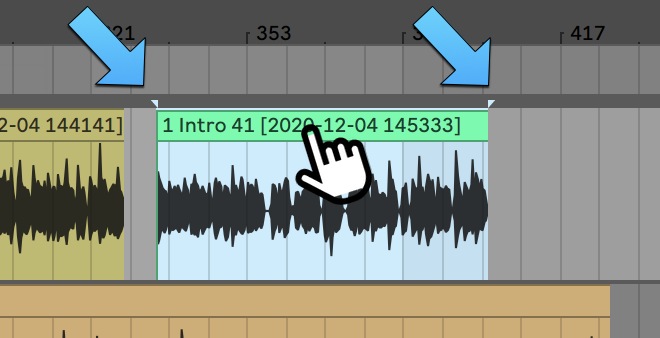
Each lecture is a separate video so now I have to map slides on certain videos and the indicator helps me with that.
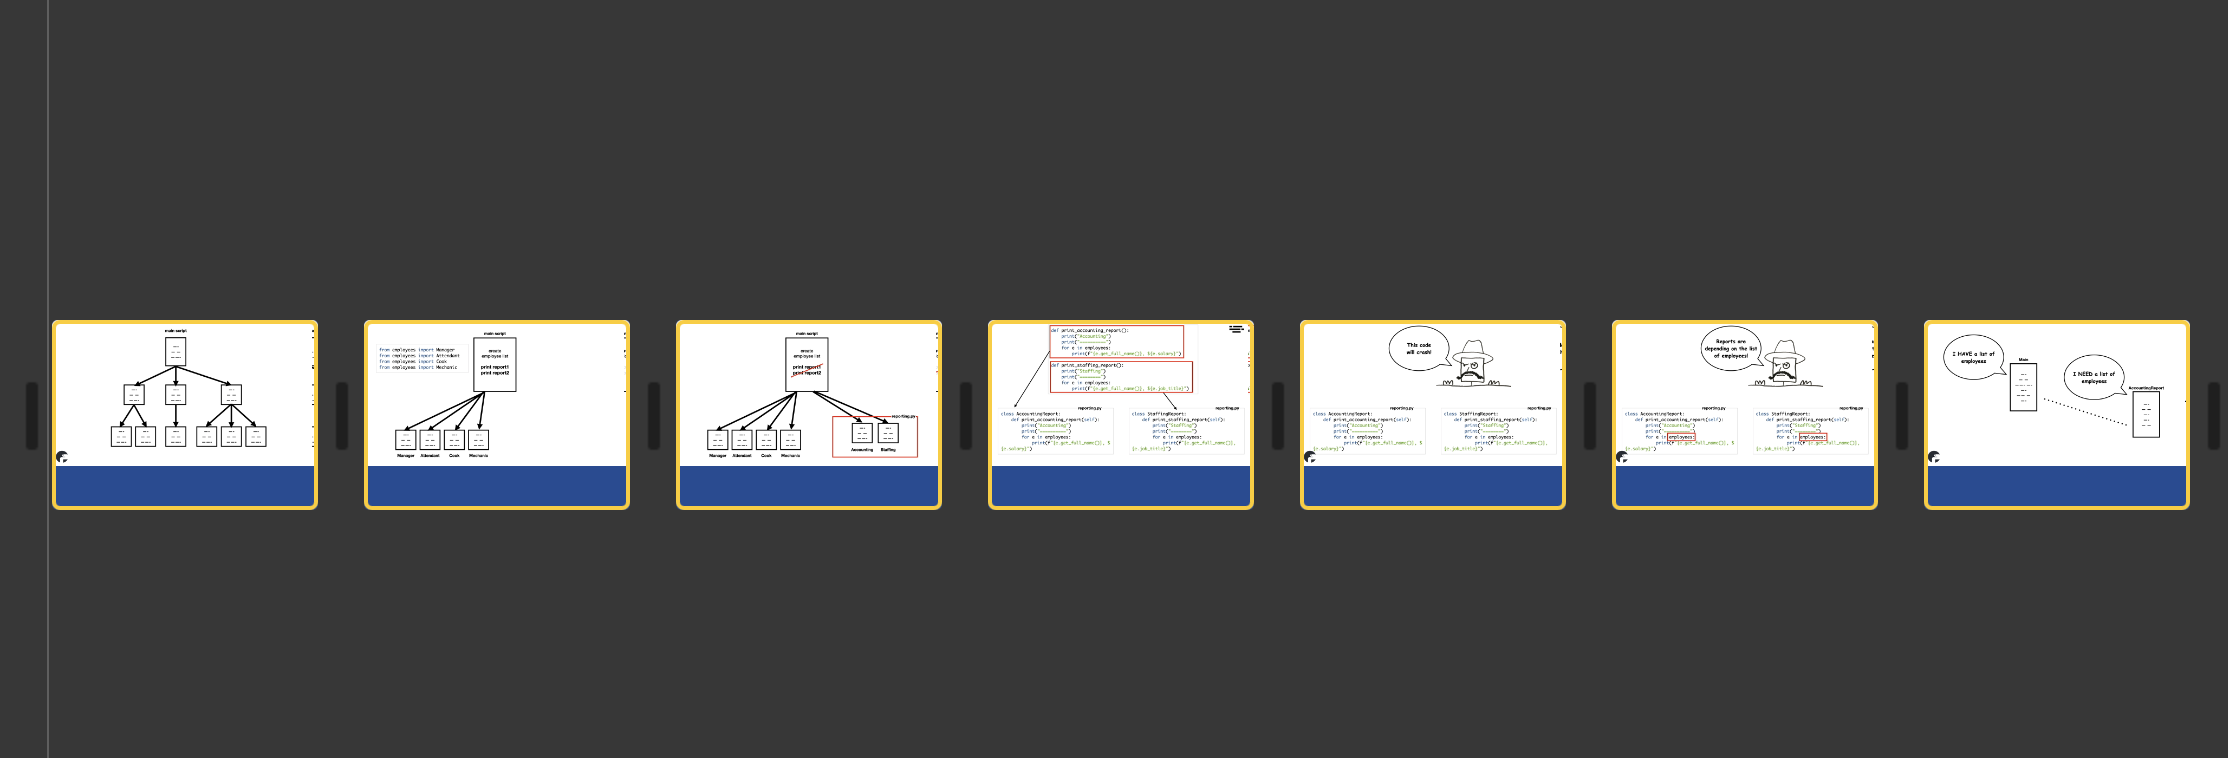
I export all slides in the Keynote (or powerpoint) file as jpeg images.
Udemy uses sections and lectures to organise a course. Each lecture is one video.
- Section 3: Classes and Objects
-- Lecture 9: Explaining the excersises
-- Lecture 10: Classes and Objects
- Section 4: ...
--
In iMovie I changed the Photo duration to 10 seconds:
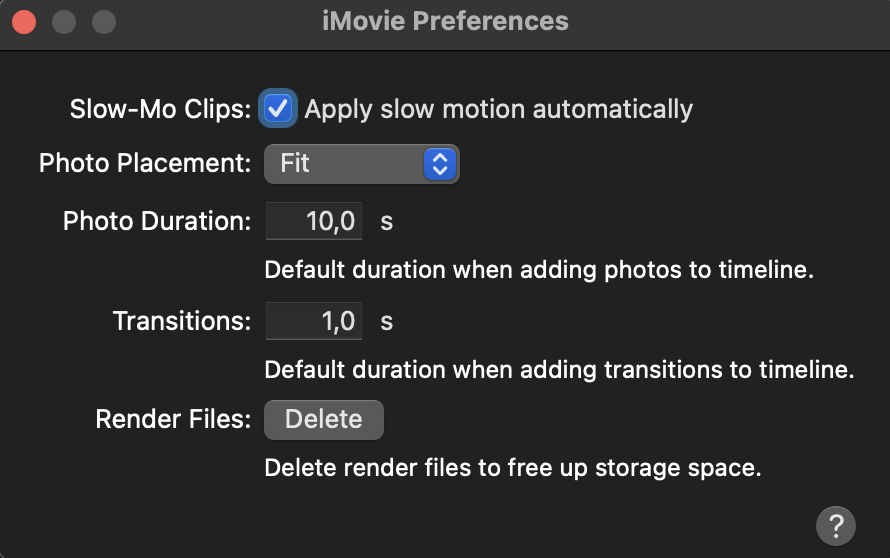
The actual slide duration depends on the length of text in the presenter notes but 10 seconds is a good value to start with.
I drag the slides (jpeg images) for one lecture on the timeline:
Now it’s time to record the text. You can do this in iMovie but I use a dedicated program for this purpose. The software I use to record the voice is Ableton Live. Ableton Live allows me to cut the audio very precisely and use my favorite audio effects to process the voice.
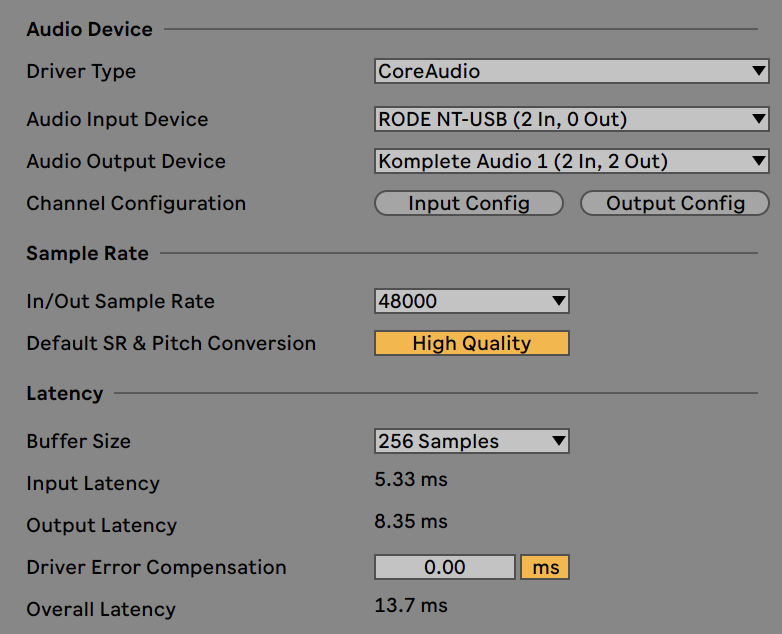
This part takes the most time as you have to search for the right settings to record your voice. It starts with buying a good microphone. I’m using the Rode NT-USB. Here is a photo of my setup:
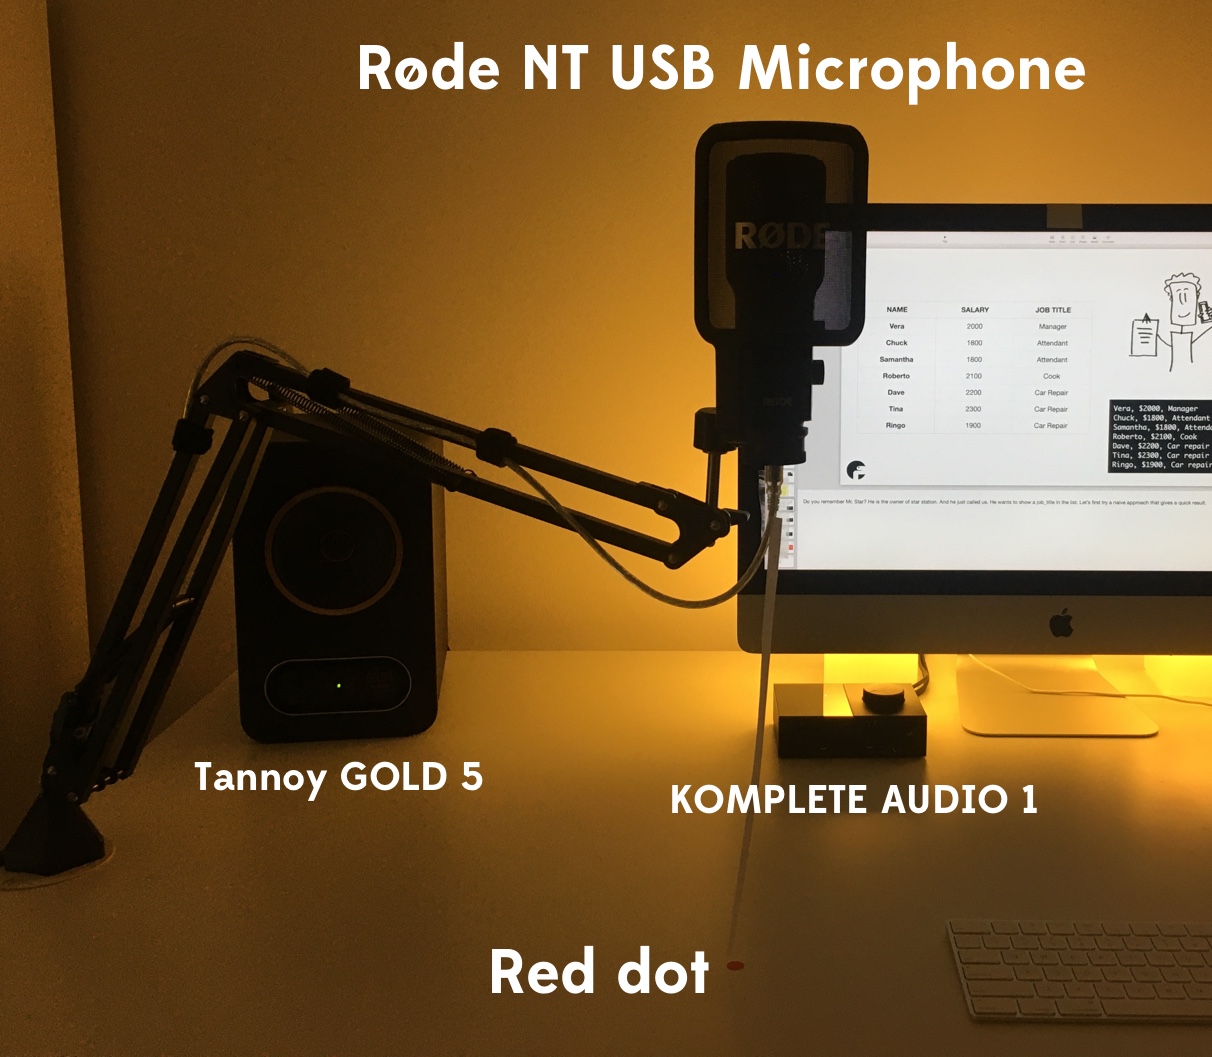
I put a red dot on my desk to align the position of the microphone. I record the voice on different days and want the same position everytime I record a new track.
On the desk you see the left Tannoy Gold 5 studio monitor which is connected to a Komplete Audio 1 audio interface. The Studio monitors and audio interface are not required. I have them because I also record my guitars.
The Audio Device settings on macOS for the Røde NT USB look like this:
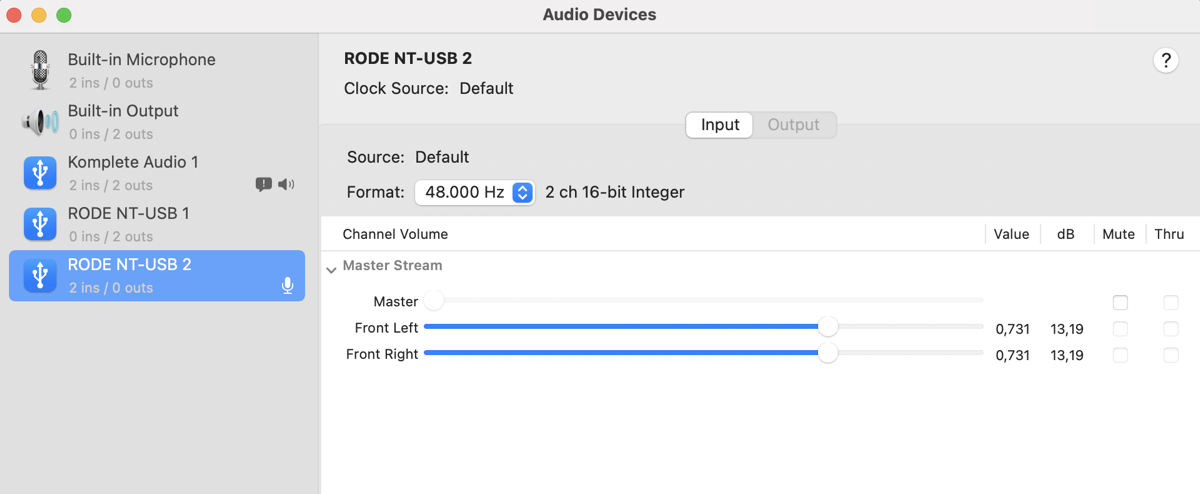
I have a pretty loud voice and noticed I have less distortion when I set the value to around 0,7. In Ableton I have the following audio settings:
When I first started to record my voice, I used one Ableton project per course section. While working on the tracks, I changed some settings and had to update the settings in each project. This was error-prone so I decided to put all sections in a single Ableton project. Here is a picture of the finished product:
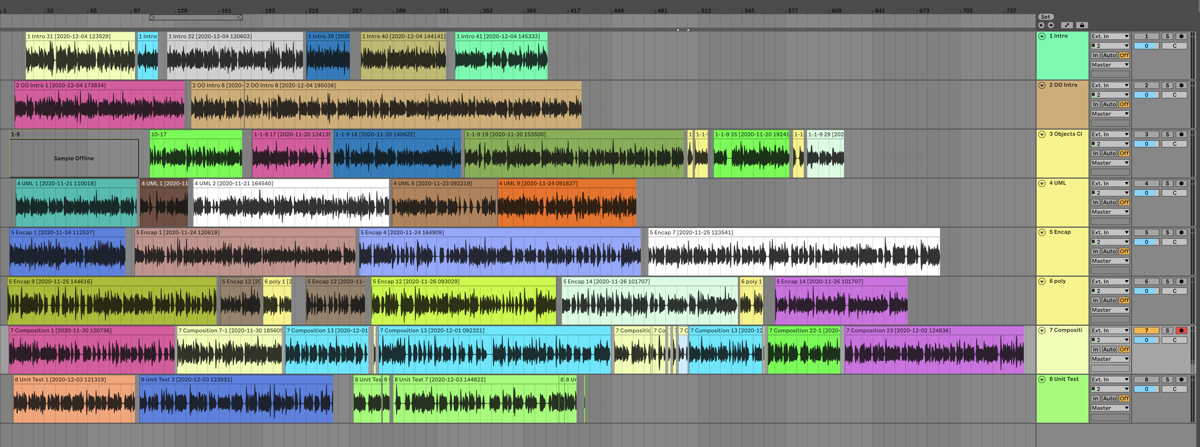
As you see there are eight tracks (for eight sections) an you can roughly see the lectures because they have different colors. Notice how you get a good idea how large each section in your course will be.
Each track is routed to the Master Track and the Master Track has four insert effects in this order:
I use the Kotelnikov Compressor to compress the audio. Here are the settings:
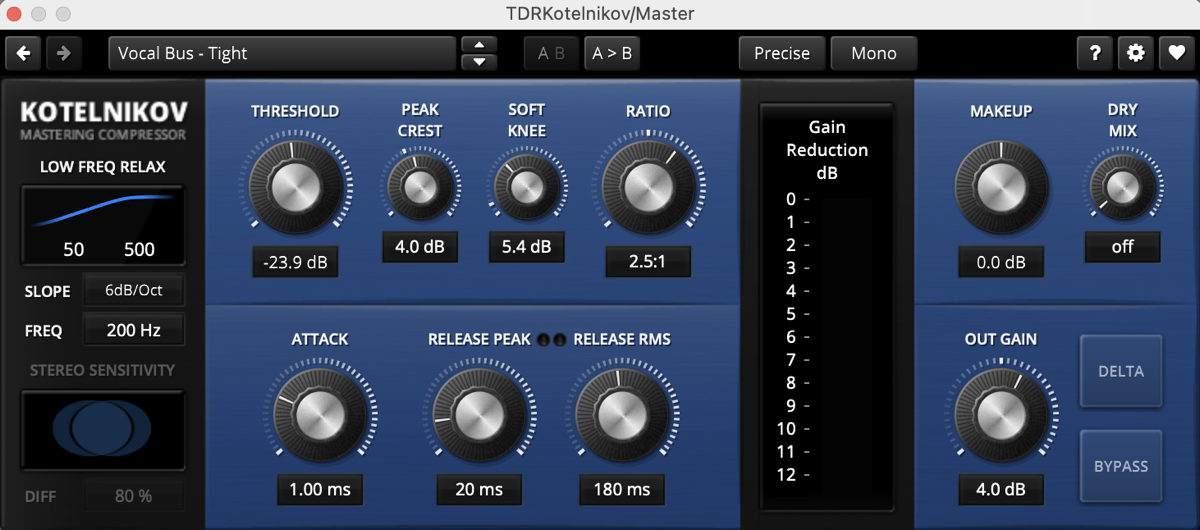
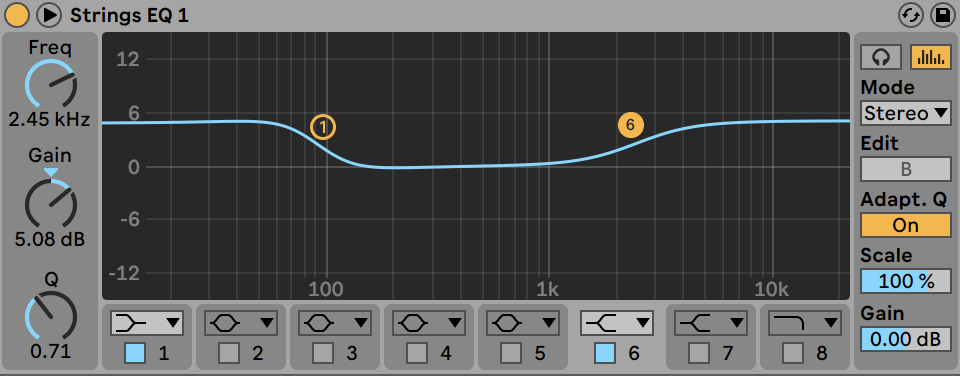
Although I use the Kotelnikov Compressor, you can use any compressor you like. Just play with the settings until it fits your voice. I use EQ to boost the low end and high end:
The limiter boosts 3 dB and limits at -1 dB:
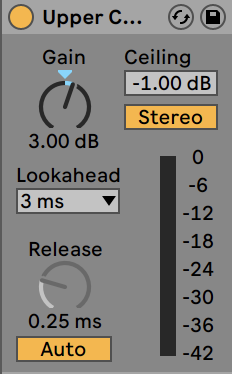
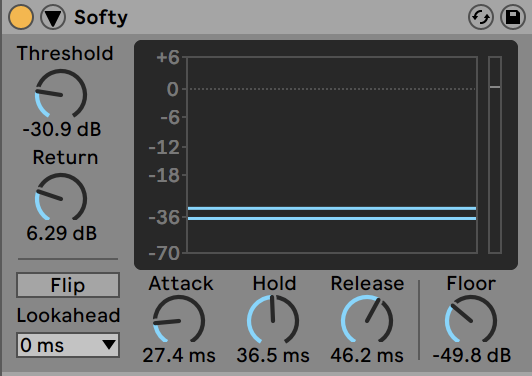
Finally a gate is applied. This supresses low volume noises like breathing when I’m not talking.
Here you see the effects in order:

Recording your voice can be a strange experience. People tend to speak fast to get it over with :-). My tip is: Keep a natural pace. Don’t try to speak slower or faster. But keep this in mind: speak-out-every-word. Even if it sounds robotical at times. It’s better to sound robotical than swallow words!
Pro TIP: When you speak, make sure you create pauses around the paragraphs. This allows your audience to think about what you said. Always create a pause before proceeding to the next slide! If you are narrating the code, create a lot of pauses. If you are like me, you speak a lot faster than you can type code.
Remember: In programs like Ableton Live, cutting pauses away is a lot easier than trying to insert a pause in an existing recording!
If you make a mistake while talking, pause a moment and start the sentence again. When you are done recording, cut away all mistakes and join the remaining audio into blocks of audio. It will sound as if you made no mistake at all!
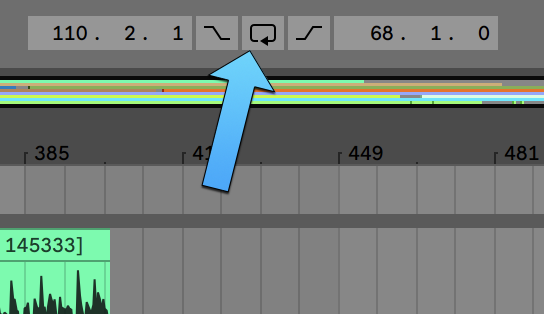
In my Ableton Project, each block of audio is a lecture. Clicking on a block of audio sets the loop markers:
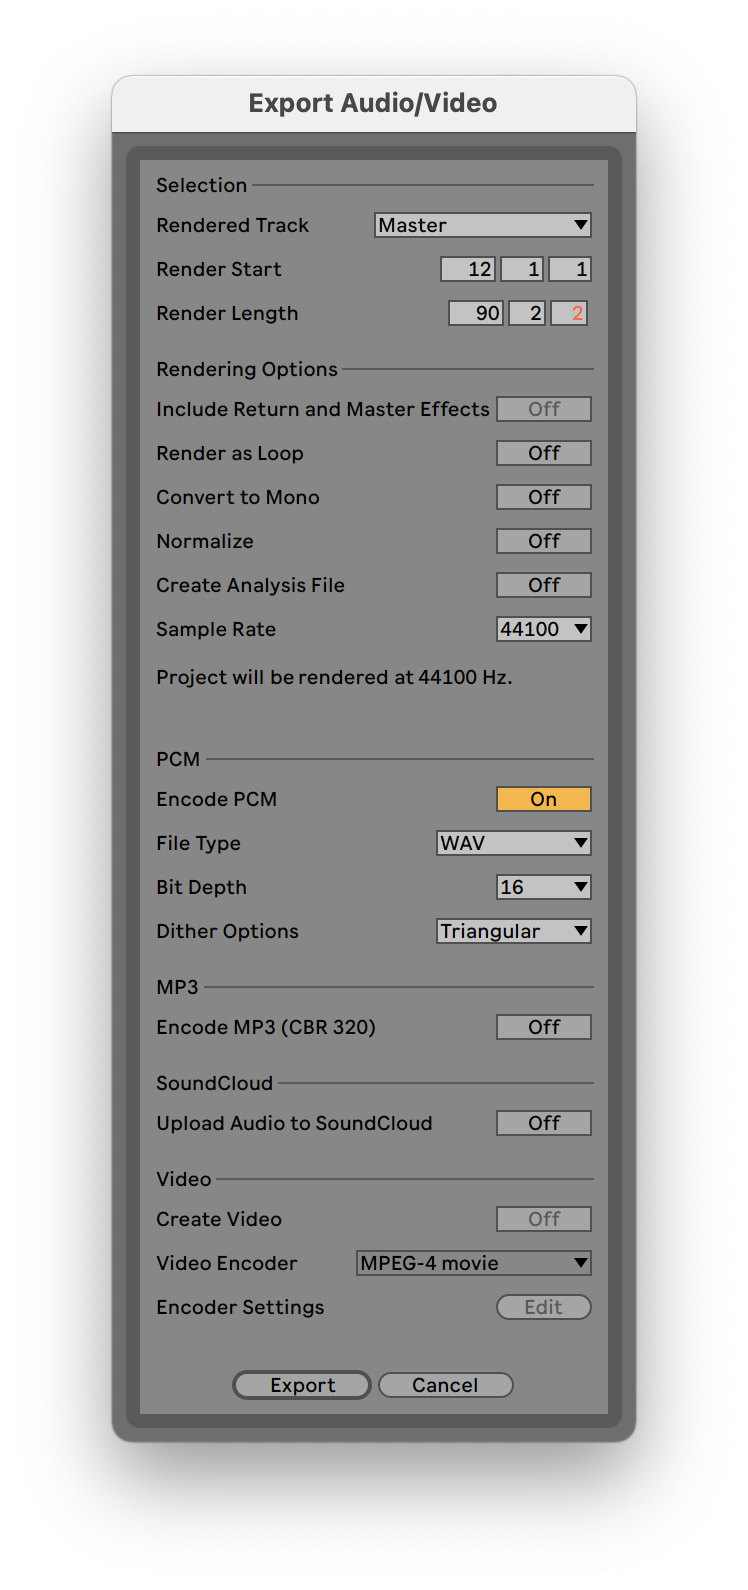
Then I export with these settings:
I use the macOS screen recording tool (Screenshot.app) to record the code I type. My code editor is Atom and this is how I prepare:
set x to 100
set y to 200
set w to 1920
set h to 1080

tell application "Atom"
activate
reopen
set the bounds of the first window to {x, y, x + w, y + h}
end tell
linter-flake8, linter-ui-default, autocomplete-plus, autocomplete-snippets.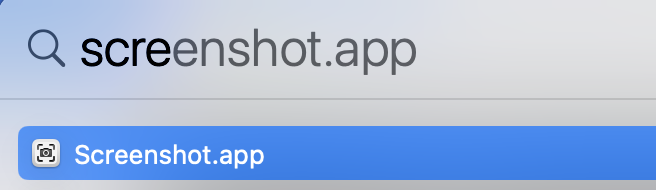
This part also takes a lot of time. There is no uniform way to layout text and images but my general tip is: Whenever a new image starts, wait a second, start the audio and after the audio, take another second before going to the next slide.
When you type big chuncks of code, it’s OK to speed it up a bit.
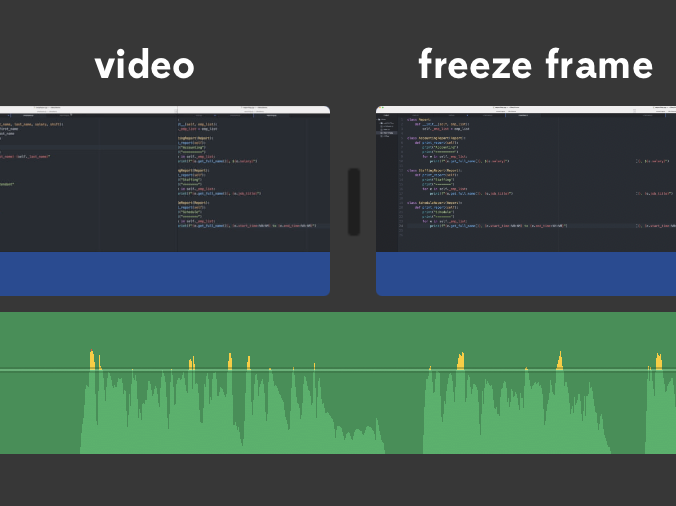
Warning: Speeding up can make it look unnatural and you cannot prevent the cursor from blinking faster (or slower).
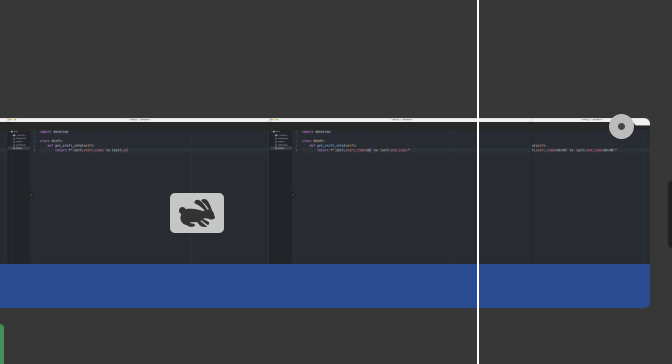
If you find out you need more time to explain the code but do not have more video frames, create a freeze frame in iMovie. I do this at the moment where the cursor blinks OFF.
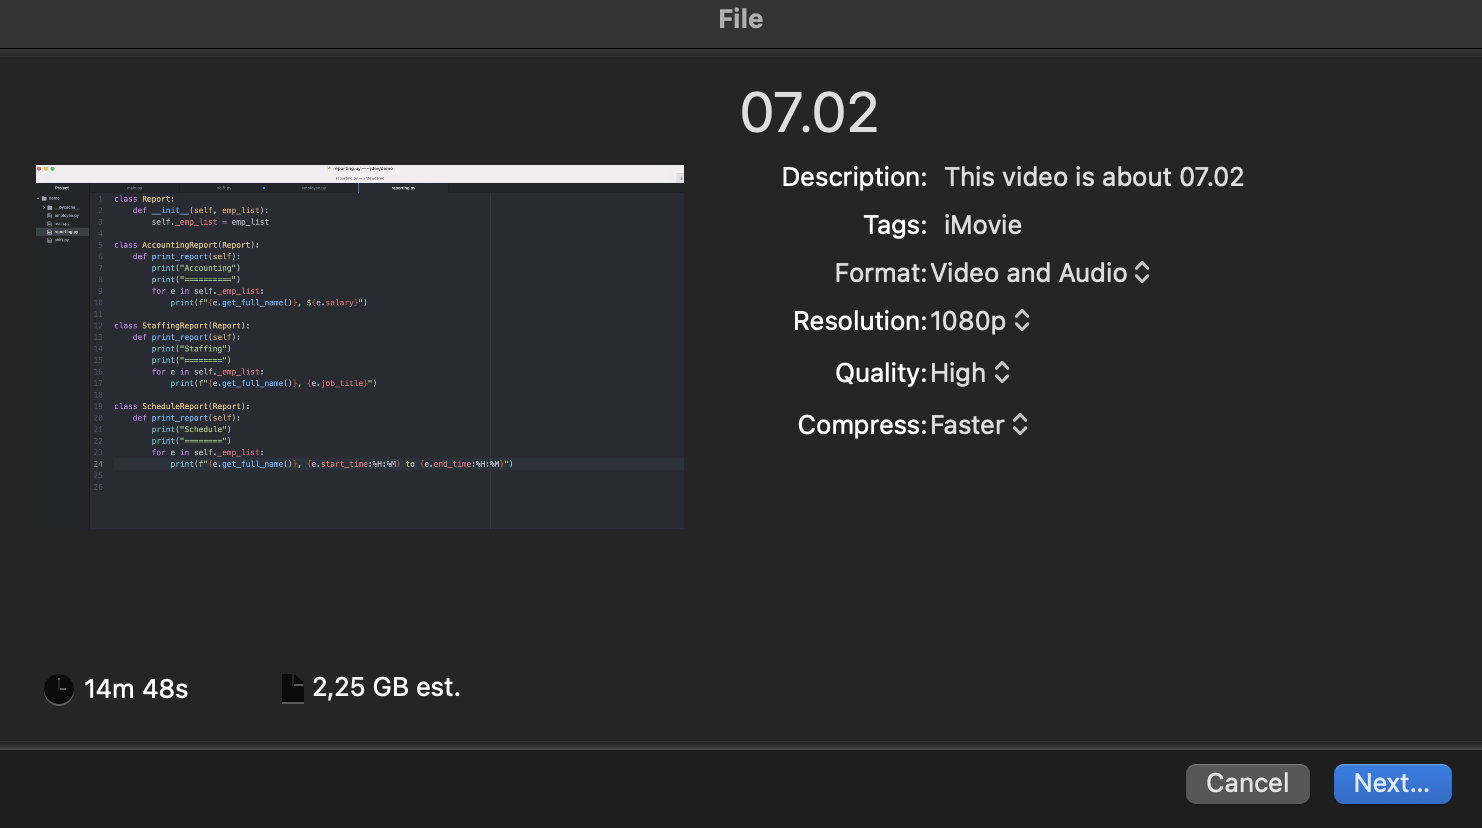
As a last step before uploading, I need to export the video. Here are the settings in iMovie.
I hope this helps you if you also think of creating an online course out of your classroom training!